

-
Products -PCBA Manufacturing RF Connectors RF Cable Assemblys Embedded Antennas External Antennas GNSS Positioning Solutions
RF Connectors

RF Cable Assemblys
Embedded Antennas
External Antennas
GNSS Positioning Solutions


 Language


Language


Time:2026-10-13 Views:0
Building a custom GNSS receiver box is a critical skill for engineers, surveyors, drone operators, and IoT developers seeking highprecision positioning, longterm durability, and customized functionality. A wellbuilt GNSS receiver box protects sensitive satellite navigation hardware from environmental damage, electromagnetic interference (EMI), and physical wear while stabilizing RTK (RealTime Kinematic) and standard GNSS signal performance. Whether you need a portable field unit for land surveying, a fixed base station for drone mapping, or an industrialgrade GNSS receiver for smart agriculture and autonomous machinery, this comprehensive GNSS receiver box build guide covers every detail from component selection, enclosure design, wiring assembly, firmware configuration, to testing and optimization. By following this tutorial, you can construct a professional, costeffective GNSS receiver box that outperforms generic offtheshelf units in reliability and adaptability.
What Is a GNSS Receiver Box & Why Build a Custom One?
A GNSS (Global Navigation Satellite System) receiver box is a compact, enclosed hardware system that integrates a GNSS receiver module, antenna, power management unit, data processing controller, and communication interfaces to capture, decode, and output satellite positioning data. It supports all major global navigation systems, including GPS, GLONASS, Galileo, BeiDou, and QZSS, delivering meterlevel to centimeterlevel positioning accuracy based on hardware and configuration.
Most commercial GNSS receiver boxes suffer from limitations such as fixed functionality, poor scalability, high costs, and inadequate environmental protection for specialized field applications. Building a custom GNSS receiver box solves these pain points and offers unique advantages for both professional and hobbyist use cases:
Full Hardware Customization: Select highperformance modules (e.g., ublox ZEDF9P, NEOF9P) tailored to your accuracy needs, from standard GNSS tracking to dualfrequency RTK centimeterlevel positioning.
Enhanced Durability & Environmental Resistance: Design weatherproof, dustproof, and EMIshielded enclosures for outdoor deployment in construction sites, farmlands, and remote industrial areas.
Flexible Connectivity & Scalability: Integrate Ethernet, USB, UART, Bluetooth, and cellular modules for flexible data transmission, remote monitoring, and system expansion.
Cost Efficiency: Avoid overpaying for unnecessary commercial features while investing only in components that match your project requirements.
Optimized Signal Stability: Custom internal wiring and shielding eliminate signal interference, ensuring consistent satellite lock and precise positioning data in complex environments.
Full Bill of Materials (BOM) for GNSS Receiver Box Build
The quality of components directly determines the positioning accuracy, stability, and service life of your GNSS receiver box. Below is a categorized, professionalgrade BOM suitable for both portable field units and fixed base station GNSS systems, compatible with all mainstream GNSS satellite systems.
1. Core GNSS Receiver Module
The receiver module is the brain of the entire system, responsible for capturing and decoding satellite signals. For most professional applications, the ublox ZEDF9P dualfrequency RTK module is the top choice, supporting concurrent tracking of GPS L1/L2, GLONASS G1/G2, Galileo E1/E5b, BeiDou B1I/B2I, and delivering centimeterlevel RTK accuracy. For budget standardprecision projects, the ublox NEOF9P singlefrequency module is a reliable alternative.
2. GNSS Antenna & Accessories
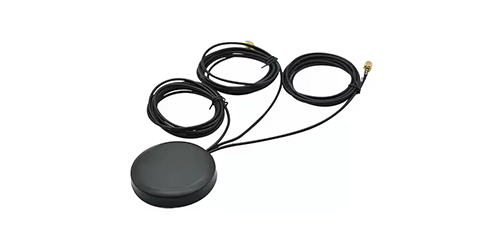
Antenna performance is decisive for satellite signal reception. A lowquality antenna will cause signal loss, weak satellite lock, and reduced positioning accuracy even with a highend receiver module. Select a dualfrequency highgain GNSS antenna with builtin LNA (Low Noise Amplifier) and SAW filter to eliminate RF interference. For outdoor use, choose a waterproof antenna with a dedicated ground plane to ensure stable signal reception in opensky environments.
Essential antenna accessories include 50Ω lowloss coaxial cables, SMA/IPEX adapter connectors, and antenna mounting brackets for fixed installation.
3. Main Controller Unit
A lightweight singleboard computer (SBC) is required to process GNSS data, run firmware, and support data transmission. The Raspberry Pi 4 Model B is the most widely used option, offering stable USB/Ethernet connectivity, sufficient processing power, and excellent system compatibility. For lowpower portable devices, Raspberry Pi Zero 2 W is ideal for compact enclosure designs.
4. Enclosure & Mechanical Parts
The enclosure protects internal components from water, dust, physical impact, and EMI interference. For outdoor industrial use, select an IP67rated waterproof aluminum alloy enclosure with internal shielding coating. For indoor or temporary field use, a durable ABS plastic enclosure is costeffective. Additional mechanical parts include waterproof cable glands, rubber shockabsorbing pads, mounting screws, and ventilation filters.
5. Power Management System
Stable, clean power is critical to avoid GNSS signal drift and system crashes. Build a dedicated power system with a 5V/3A DC regulated power module, surge protection chip, reverse polarity protection circuit, and lowvoltage monitoring module. For portable use, add a lithium battery management board and rechargeable battery pack with overcharge/overdischarge protection.
6. Communication & Interface Modules
Expand system functionality with multichannel communication interfaces: Gigabit Ethernet module for wired network data transmission, USB 2.0/3.0 ports for data logging and device connection, UART serial ports for raw NMEA data output, and optional 4G/5G cellular modules for remote RTK correction data reception.
7. Auxiliary Components
Include LED indicator lights (power, signal, network status), heat dissipation aluminum fins, insulating tape, EMI shielding foam, and terminal blocks for safe and tidy wiring.
StepbyStep GNSS Receiver Box Build Process
This section provides a detailed, actionable assembly workflow from preassembly preparation to final enclosure packaging, ensuring zero errors in hardware installation and wiring.
Step 1: PreAssembly Testing & Component Inspection
Before formal assembly, inspect all components for damage and conduct preliminary functional testing to avoid wasting time on faulty hardware. First, check the appearance of the GNSS module, controller, and power board for burnt marks or broken pins. Then perform a barebone test: connect the GNSS receiver module to the Raspberry Pi via USB cable, power on the system, and verify that the module is recognized by the computer. Test the antenna signal reception outdoors to confirm normal satellite tracking function. This step eliminates defective components and ensures all hardware works properly before enclosure integration.
Step 2: Enclosure Modification & Shielding Treatment
Modify the selected enclosure according to component layout requirements. Drill precise holes for cable glands, antenna interfaces, power ports, and indicator lights, ensuring all holes match the size of external connectors. For metal enclosures, polish the hole edges to prevent sharp burrs from cutting wires. Apply conductive shielding paint on the inner wall of the enclosure or paste EMI shielding foam to block external electromagnetic interference from power lines, industrial equipment, and wireless signals, which is essential for highprecision RTK GNSS systems.
Install rubber shockabsorbing pads at the bottom of the enclosure to reduce vibration impact on internal modules during field transportation and outdoor installation.
Step 3: Internal Hardware Layout & Fixed Installation
Reasonable internal layout is the key to stable system operation and convenient later maintenance. Follow the principles of separating RF signal circuits from power circuits and shortest wiring distance. Fix the Raspberry Pi controller on the upper layer of the enclosure, the GNSS receiver module in a separate independent area (far from highspeed signal lines), and the power management module at the bottom to avoid heat transfer to precision signal components.
Use insulating screws and plastic spacers to fix all modules, preventing short circuits caused by direct contact between circuit boards and the metal enclosure. Reserve sufficient space for heat dissipation to avoid hightemperature component failure in longterm outdoor operation.
Step 4: Precision Wiring & Circuit Connection
Wiring quality directly affects GNSS signal stability and system safety. Follow professional wiring standards for all connections:
Antenna Wiring: Use 50Ω lowloss coaxial cables to connect the GNSS antenna to the receiver module’s SMA/IPEX interface. Avoid excessive cable bending and stretching to prevent signal attenuation. Ensure the connector is fully locked to avoid poor contact.
Power Wiring: Thickened copper wires are used for power circuit connections to reduce voltage drop. Add fuse and reverse polarity protection to prevent module burnout caused by wrong power connection or voltage surge.
Signal Wiring: UART/USB signal lines are kept away from power lines and heatgenerating components to avoid crosstalk interference. All wiring is sorted and fixed with cable ties to prevent loose contact caused by vibration.
Grounding Processing: The metal enclosure and all module grounding terminals are uniformly grounded to form a stable grounding system, effectively suppressing static electricity and EMI interference.
Step 5: Waterproof & Dustproof Sealing
For outdoor GNSS receiver boxes, sealing treatment is indispensable. Install waterproof rubber gaskets on the enclosure cover, fill the gaps of cable glands with waterproof sealant, and seal all drilled holes to achieve IP67level waterproof and dustproof performance. Ensure the sealing does not block heat dissipation holes and ventilation filters to avoid internal heat accumulation and moisture condensation.
System Configuration & Firmware Setup for GNSS Receiver Box
After hardware assembly, professional system configuration is required to activate full GNSS functionality, optimize positioning accuracy, and realize stable data output.
1. Raspberry Pi System Initialization
Flash the official Raspberry Pi OS (64bit Lite version for stable operation) to the SD card, enable SSH and serial port functions, and update the system firmware. Install core dependency libraries including Python serial tools, GNSS data parsing libraries, and network service components to support NMEA data reception and transmission.
2. GNSS Module Firmware Upgrade & Parameter Configuration
Connect the GNSS receiver module to the computer via USB, use ublox UCenter software to upgrade the module to the latest official firmware, fix known signal bugs, and unlock full satellite tracking functionality. Configure core parameters: set dualfrequency tracking mode, enable RTK fixed solution output, adjust positioning update rate to 10Hz, and standardize NMEA0183 data output format. Disable unnecessary satellite systems to reduce module power consumption and improve signal locking speed.
3. RTK Correction Data Configuration
For centimeterlevel RTK positioning, configure network RTK or local base station correction data. Set up NTRIP client on the Raspberry Pi to receive realtime correction data from cloud NTRIP servers via Ethernet or 4G module, realizing fast fixed solution of rover positioning data. Configure automatic reconnection function to ensure continuous data transmission in unstable network environments.
4. Data Logging & Remote Monitoring Setup
Enable local data logging function to store GNSS raw data and positioning results in the system SD card for postanalysis and data verification. Deploy a simple web monitoring terminal to realize remote viewing of satellite quantity, positioning accuracy, signal strength, and device operating status, supporting remote parameter modification and fault diagnosis.
Performance Testing & Optimization of GNSS Receiver Box
After assembly and configuration, systematic testing and optimization are required to ensure the receiver box meets professional precision and stability standards.
1. Basic Function Testing
Place the GNSS receiver box in an opensky outdoor environment, power on the device, and observe the indicator status. Verify normal satellite search and locking functions, check the number of tracked satellites (more than 20 satellites for stable dualfrequency operation), and confirm normal output of NMEA positioning data. Test network connectivity and remote data transmission stability to ensure no data packet loss or disconnection.
2. Positioning Accuracy Calibration
Compare the positioning data of the custom GNSS receiver box with professional surveying and mapping equipment. For RTK mode, verify that the horizontal positioning accuracy reaches ±1cm+0.5ppm and vertical accuracy reaches ±2cm+1ppm. For standard GNSS mode, confirm meterlevel stable positioning. Optimize antenna orientation and internal shielding structure to reduce positioning drift and error fluctuation.
3. Environmental Adaptability Test
Conduct waterproof, dustproof, and highlow temperature resistance tests. Place the device in rainy and dusty outdoor environments for continuous operation, check for internal water ingress or dust accumulation. Test stable operation in the temperature range of 20℃ to 60℃ to ensure the device adapts to complex field working conditions.
4. Signal Stability Optimization
Optimize internal wiring paths to reduce RF signal interference, replace lowloss cables for longdistance transmission, and adjust the antenna installation height to avoid sheltering. Enable module signal filtering and noise reduction functions to improve signal stability in urban canyon, suburban woodland, and other complex sheltered environments.
Common Faults & Troubleshooting for GNSS Receiver Box
Even with standardized assembly and configuration, the GNSS receiver box may encounter occasional faults during longterm operation. Below are common problems and professional solutions to improve device maintenance efficiency:
Slow Satellite Locking & Few Tracked Satellites: Main causes include poor antenna contact, signal shielding, outdated firmware, or surrounding signal interference. Solutions: Check antenna cable connection, adjust antenna to opensky position, upgrade module firmware, and strengthen internal EMI shielding.
RTK Fixed Solution Failure: Caused by abnormal correction data reception, insufficient satellite quantity, or unstable network. Solutions: Verify NTRIP server account and network connection, ensure more than 12 effective satellites, and optimize correction data transmission delay.
Random Device Disconnection & Restart: Usually caused by unstable power supply or internal short circuit. Solutions: Check power module output voltage, eliminate wiring short circuit hazards, and enhance power surge protection.
Abnormal NMEA Data Output: Caused by incorrect serial port parameter configuration or module parameter confusion. Solutions: Restore module factory settings, reconfigure baud rate and data output format, and update parsing program.
Application Scenarios of Custom GNSS Receiver Box
The selfbuilt highprecision GNSS receiver box has wide adaptability and can meet the positioning needs of multiple industries:
Land Surveying & Mapping: Provide centimeterlevel precise positioning for engineering surveying, terrain mapping, and construction layout, replacing expensive commercial surveying equipment.
Drone Mapping & Navigation: Serve as a fixed base station to provide RTK correction data for drones, improving aerial mapping accuracy and autonomous flight stability.
Smart Agriculture: Applied to agricultural machinery automatic navigation, farmland boundary survey, and precision planting positioning, adapting to harsh outdoor farmland environments.
Industrial Automation: Provide highprecision positioning for autonomous AGV vehicles, port machinery, and outdoor industrial equipment, supporting longterm stable operation.
Geological Monitoring: Used for surface displacement monitoring, landslide early warning, and geological deformation data collection with high stability and low drift.
Maintenance Tips for LongTerm Stable Operation
To extend the service life of the GNSS receiver box and maintain longterm highprecision performance, follow daily maintenance specifications:
Regularly check the antenna cable and waterproof seal to avoid signal attenuation and water ingress damage caused by aging accessories.
Clean internal dust and ventilation filters every 3 months to ensure heat dissipation and prevent component aging caused by high temperature.
Upgrade module firmware and system programs regularly to optimize signal processing algorithms and fix potential bugs.
Check the grounding system and power stability periodically to avoid interference and voltage fluctuation affecting positioning accuracy.
Store spare antennas and power modules for rapid replacement in case of component failure to ensure continuous system operation.
Final Thoughts
Building a custom GNSS receiver box is a perfect combination of hardware integration, software configuration, and engineering optimization. Compared with offtheshelf products, selfbuilt GNSS receiver boxes have unparalleled advantages in customization, cost performance, environmental adaptability, and scalability. This stepbystep guide covers all links from component selection, assembly wiring, system configuration, performance testing to daily maintenance, helping both professional engineers and technical enthusiasts build highprecision, rugged, and reliable GNSS receiver devices.
Whether you are building a portable RTK rover for field work or a fixed base station for longterm monitoring, following this build process will help you avoid common pitfalls, optimize positioning performance, and create a GNSS receiver box that fully matches your project requirements. With continuous optimization of hardware and parameters, your custom GNSS receiver box can achieve industrialgrade stability and centimeterlevel positioning accuracy for longterm outdoor professional applications.
Lucy Yang | lucy.y@toxutech.com
Dotty Zhao | sales04@toxutech.com
Global Business Director / Sales Team / Global Operations


 En
En Cn
Cn Korean
 Home >